After integrating Dext Prepare with Xero, your Xero Tracking Categories will be imported into your Dext Prepare account.
Note: This is not related to the Xero Projects add-on product.
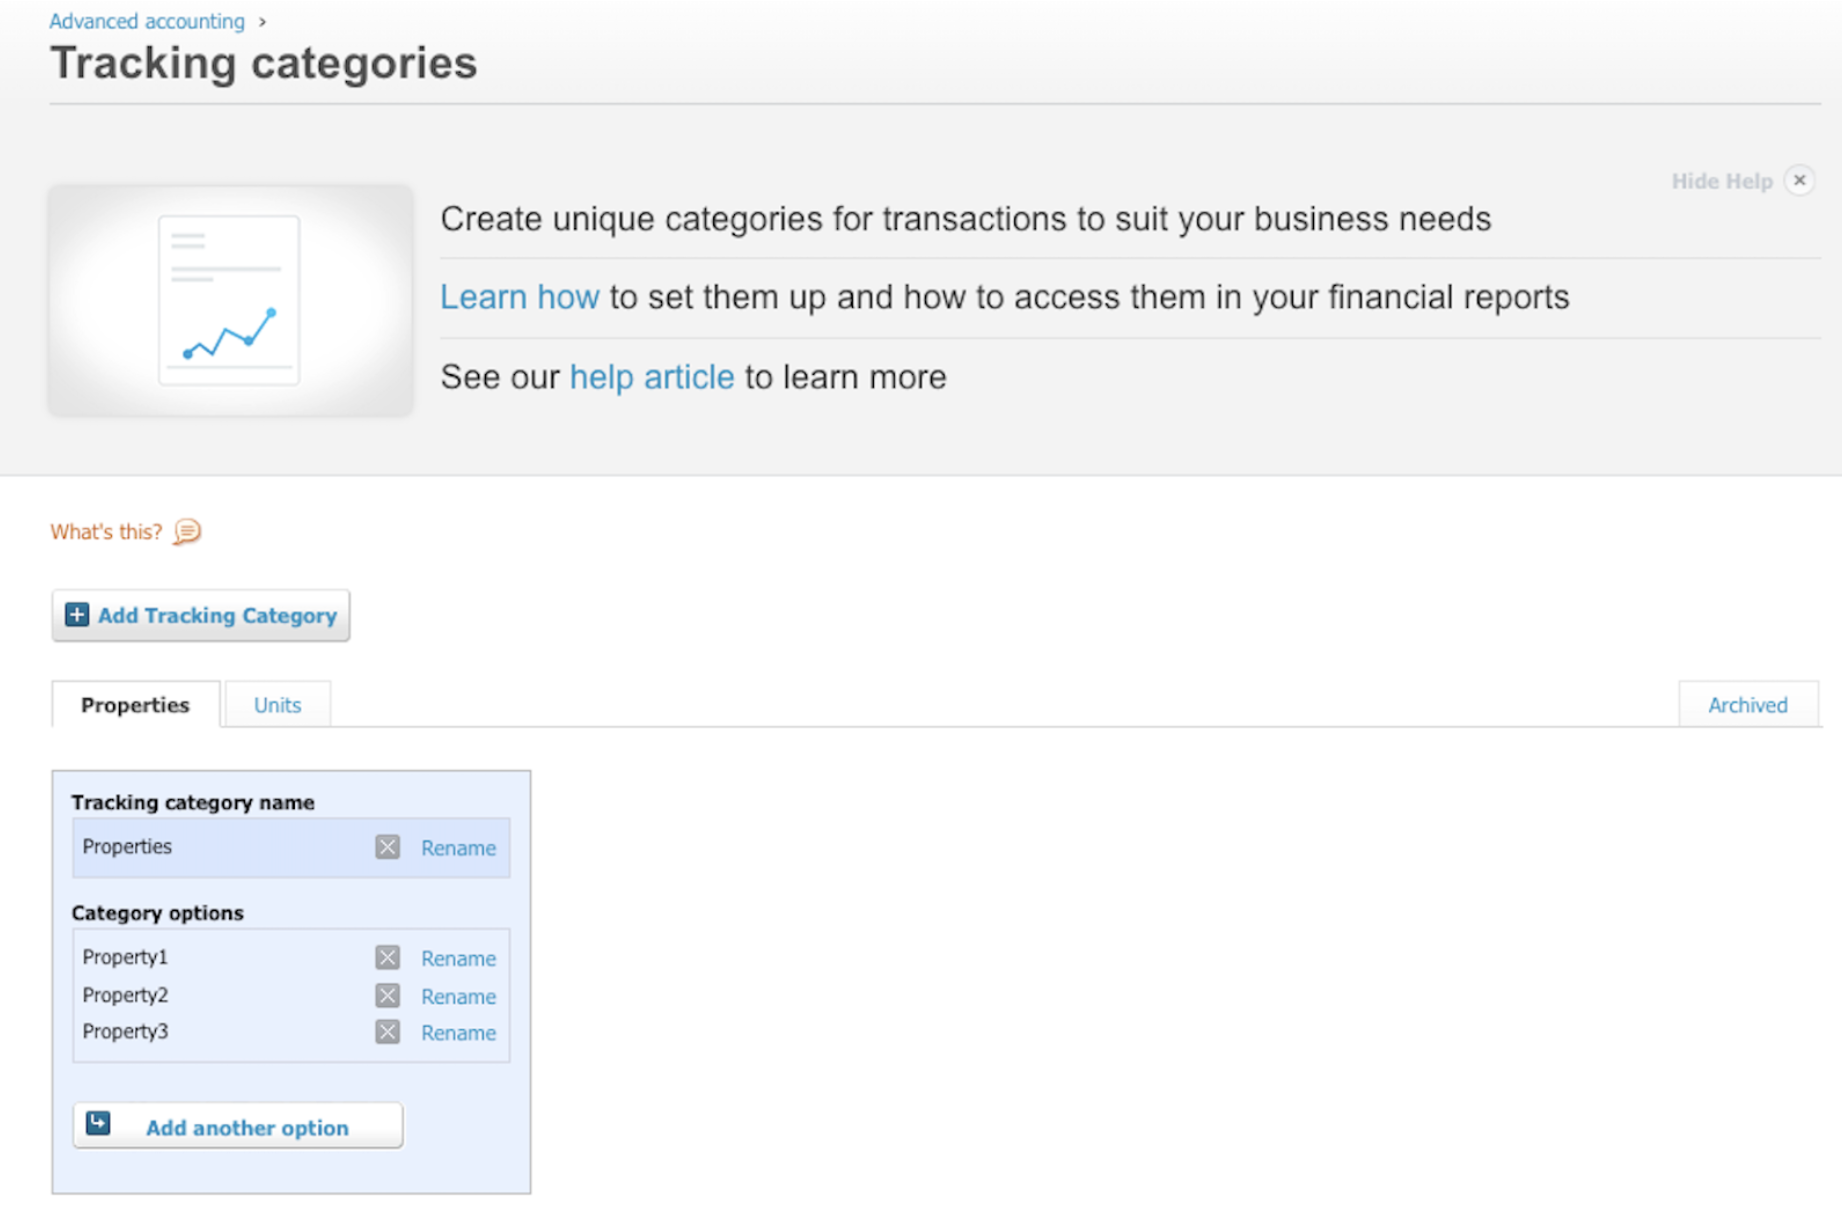
The names of your Tracking Categories within Xero will be imported into Dext Prepare.
Your Tracking categories can be created and edited in this section of your Xero account:
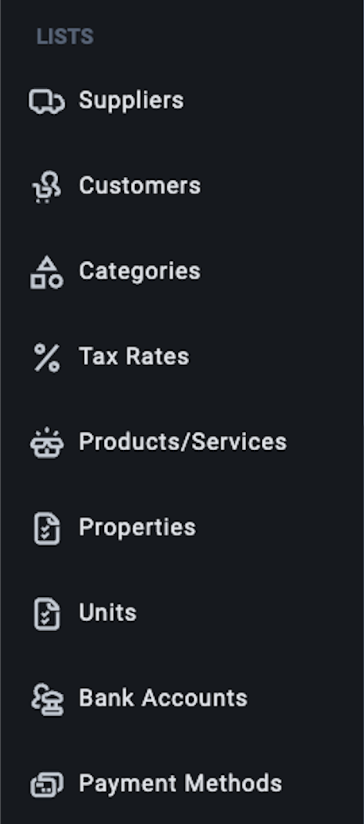
In the Dext Prepare web application you will then find the two Tracking Categories you’ve created in Xero in the sidebar menu in the Lists section. This is also where you can refresh the categories and choose your options:
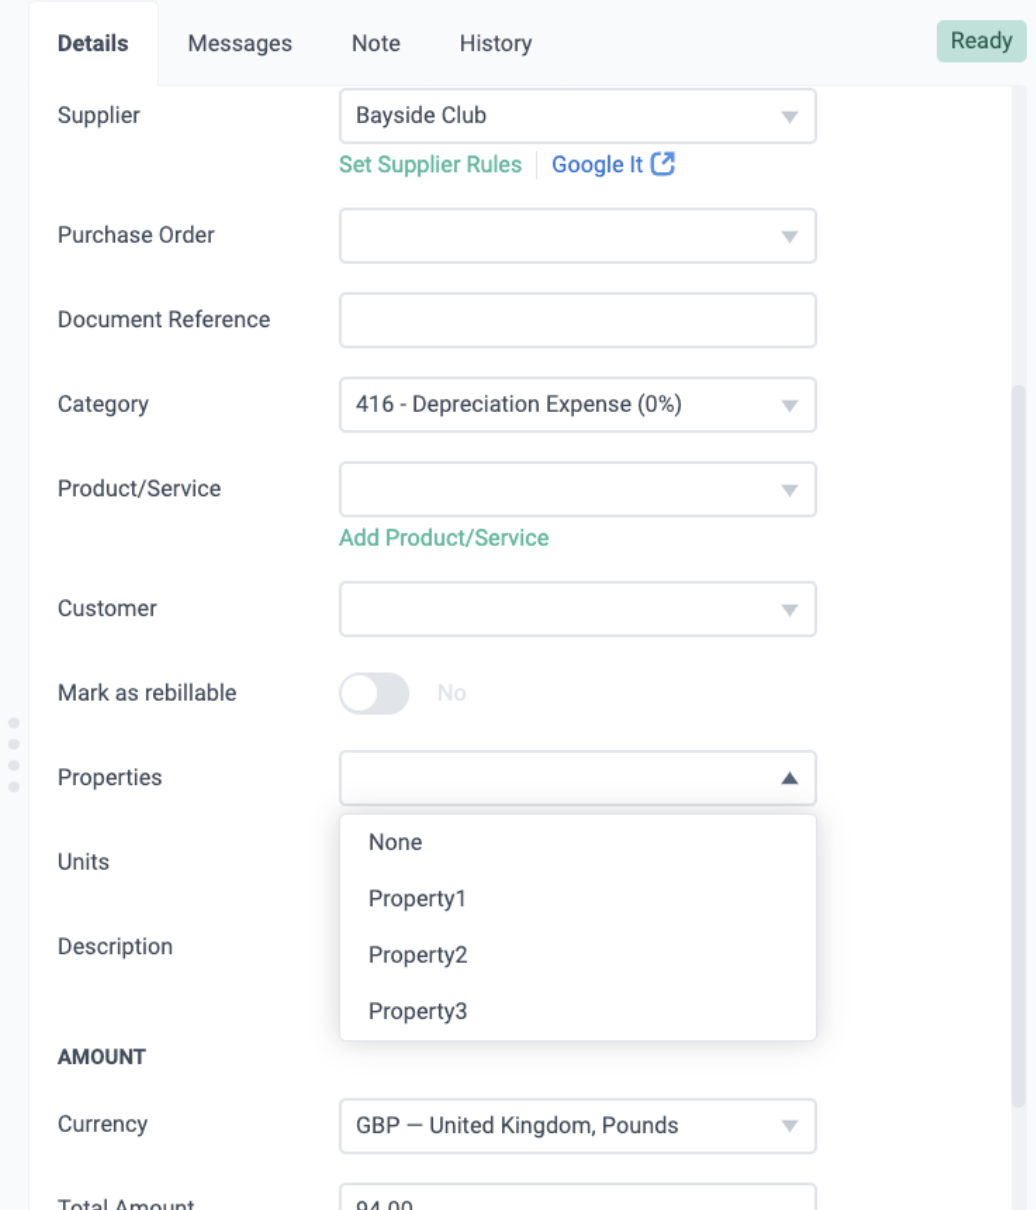
On the item details page you can then assign the Tracking Category and options you have created in Xero to any document that has been submitted.
Dext Prepare will automatically suggest the categories that could be applied to the relevant fields, based on the information detected in the item. You see this highlighted as ‘Suggested’ in the dropdown list and by the icon next to the suggested category.
Tip: when setting a name to a given project/tracking category, we advise you to choose something that could be found in the text of the document – this will make it easier for the automation algorithm to correctly recognise it.
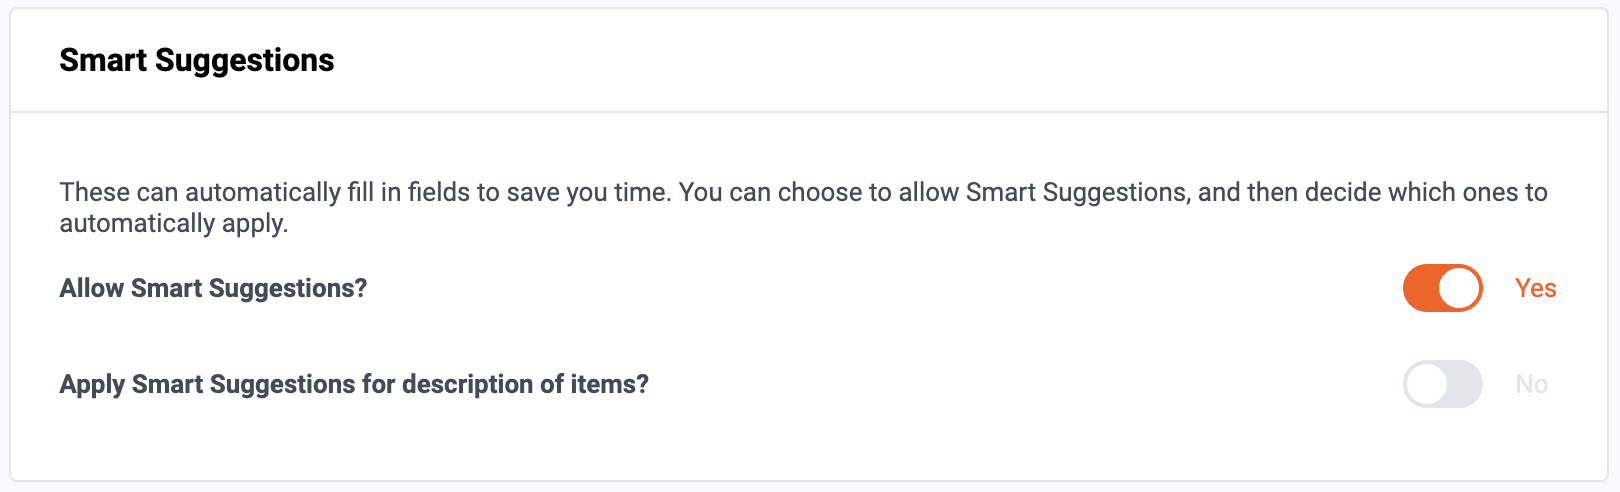
You can enable Smart Suggestions by going to Business settings >Lists >Automation >Smart Suggestions and setting ‘Allow Smart Suggestions’ to Yes. You can also apply smart suggestions for descriptions of items.